I just had a little experience this weekend where a feature in Photo Mechanic ended up saving me from an unexpected headache, so I thought I would share. Mick from Camera Bits here. I was on assignment to photograph some street murals for reproduction. The goal wasn’t a creative interpretation of the artwork; it was to create a high-resolution, accurate record of the mural that could be used later for publication and archival purposes.
I’ve done some pretty large panoramas for commercial purposes before, but for this project, I decided to use the Pixel Shift Multi-Shot feature in my Fujifilm X-T5. It was my first time giving this capability a try. Pixel Shift captures a series of images while slightly shifting the sensor between exposures. Those frames can later be combined into a single ultra-high-resolution image with improved color accuracy and detail. For a static subject like a mural, it’s a pretty powerful tool, and I was excited to see how it came out.
As I worked my way across the wall, I photographed multiple sections of the mural, capturing a bunch of Pixel Shift sequences. Everything went smoothly in the field. It wasn’t until I got back to my computer that I realized I had neglected one tiny but important step.
I hadn’t shot any spacer frames.
If you’ve worked with burst sequences before, you may already know the trick: after completing one sequence, you make a photograph of your hand, your shoe, the ground, or anything else obviously different from the subject. Those spacer frames make it much easier to identify where one sequence ends and the next begins when you’re sorting through hundreds of nearly identical images later.
Unfortunately, I never thought to do that. I had worked out a pretty detailed checklist to keep myself on track, but since I hadn’t used this feature before, my workflow was missing this helpful step.
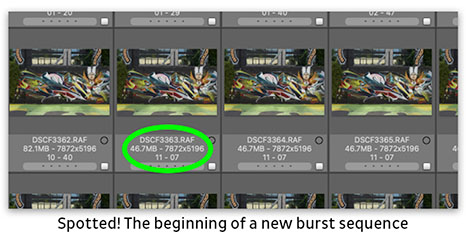
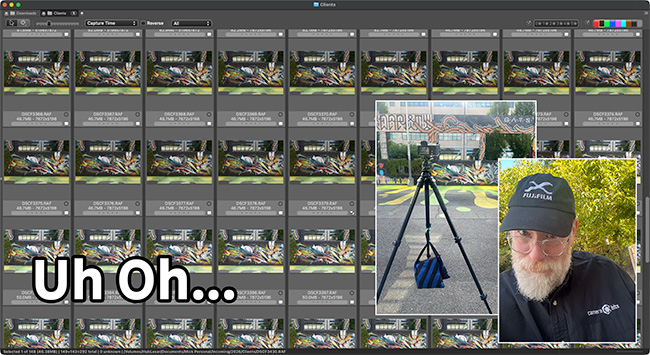
When I imported the images into Photo Mechanic, I was faced with long runs of mural photographs that looked almost identical in the Contact Sheet. At first glance, it wasn’t obvious where one Pixel Shift sequence ended and the next started.
Then I remembered that Photo Mechanic’s Contact Sheet labels are highly customizable.
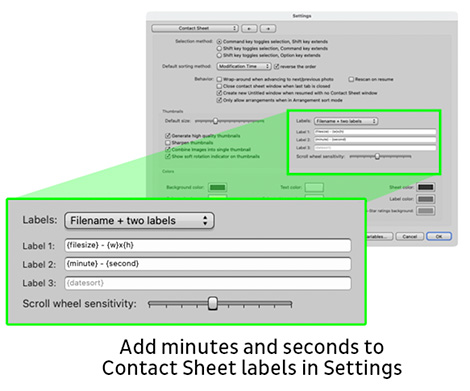
By default, most photogs display filenames, captions, or other common metadata beneath thumbnails. But Photo Mechanic also allows you to display the seconds portion of the capture time. Since the camera records the exact time each frame is made in the EXIF, those seconds become an easy way to spot breaks between sequences. I did this by going to Settings > Contact Sheet and adding a line to the labels field and adding this:
{minutes} - {seconds}
After adding the seconds field to my Contact Sheet labels on its own, the pattern became immediately obvious visually. Frames within a Pixel Shift burst shared identical second values that I could quickly see without having to parse a long time field. Gaps were easy to see. What had looked like an endless stream of similar thumbnails suddenly became easy to navigate. I could select the 20-frame sequences in the Contact Sheet and drag them into Fujifilm’s dedicated combiner software.
It was one of those small reminders that Photo Mechanic isn’t just about ingesting and captioning images. Sometimes, the ability to customize exactly what information you’re looking at can solve a problem you didn’t know you were going to have when you pressed the shutter. In my case, it saved me from having to manually inspect hundreds of files to figure out which images belonged together.
If you want to learn more, check out our Knowledge Base article on Contact Sheet preferences.