Regardless of the genre of photography you work in, it’s important to develop an efficient and reliable workflow, from organizing your folders to culling, editing, and sharing your files. Post-production can quickly wreak havoc on your productivity if you do not have a system in place. Wedding photographers, for example, often capture 2,000+ photos over the course of a day. Some larger studios, like Lin & Jirsa Photography in Orange County and Los Angeles, might expect to capture 30,000 to 40,000 images over two or three days when photographing multiple South Asian (Hindu, Sikh, etc.) weddings. Time is money, and the more time you spend processing your images, the less money you make.
For this reason, we’ve drawn upon our experience and put together a list of five wedding photography editing tips to help you maximize your efficiency and cut down the time it takes to edit a wedding.
1. Choose a Culling Workflow
Software: We’ve found that nothing matches the speed and efficiency of culling with Photo Mechanic before processing the images in Lightroom. Whereas Lightroom requires that you render a folder of 100% previews, you can simply open a folder and start culling with Photo Mechanic.
Organization: When it comes to organizing your images, you have a couple options. You can use a timestamp, which allows you to sync images from multiple cameras (depending on the size of your team), or you can separate the files by shooter/camera. At Lin & Jirsa, we cull the lead photographer’s images first, then the 2nd shooter’s, and then the assistant’s images.
Flagging System: Once your files are loaded, you have several options for keeping or rejecting files. You can add color classes (using numbers 1-6), a star-rating system (1-5), or simple tags to flag your keepers or rejects. Whichever method you choose, we recommend “editing in” and selecting the photos we’re going to keep.
Pro Tip: It helps to keyword your photos with descriptors like “detail photos” or “bridal portraits” to make it easy to locate particular files for sharing with other wedding vendors, etc. To do this in Photo Mechanic, use the Metadata (IPTC) Template or the Keyword Panel. Keywords you add during this stage will follow the images into Lightroom or wherever else you keep your photos, so this is a good time to get it done.
2. Cull for Story
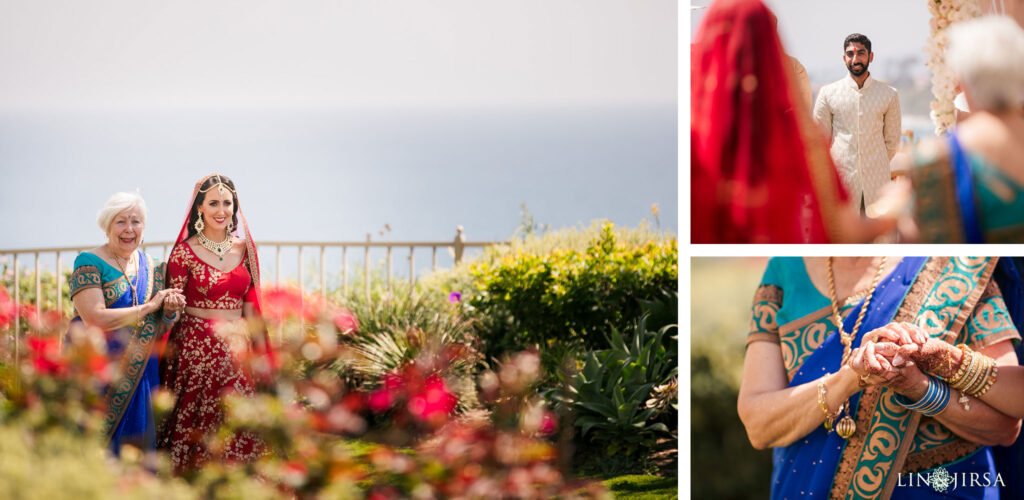
(Photos by Lin & Jirsa Photography)
When deciding which images to keep, be sure to edit for the story. Hopefully, if you’ve covered all your angles during the shoot, you’ll be able to put together sequences from each scene that can later be placed alongside one another on blogs and photo album spreads. A good spread will include a sequence of wide, medium and tight angles. You can learn more about how to shoot for story in our guide for mastering wedding ceremonies.
Pro Tip: While it might be tempting to deliver more photos to add value for your clients, doing so can actually prove detrimental. Choose only the images that add value to the collection. If every image you deliver is stellar, even if it means delivering fewer images, then your collection will have a stronger impact on your client.
3. Create Tone Setters for Each Scene
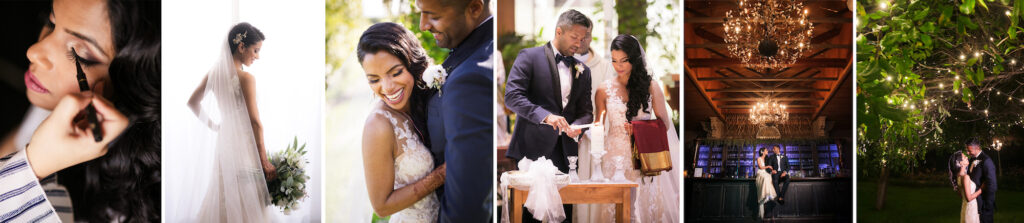
(Photos by Lin & Jirsa Photography)
Because wedding photographers typically capture several hundred (if not thousands of images) at each event, color correcting the images should be limited to no more than 3-5 quick adjustments; otherwise, the workload can quickly build up to overwhelming levels. In order to achieve this goal, it helps to set up a foundation of RAW edits that we call “tone setters.” Each part of the wedding day tends to unfold in different locations under a variety of lighting scenarios. For every scene change (from bride prep to the first look, the ceremony, dark reception hall, etc.), we like to create a tone setter that can later be applied to all of the images in that scene (we’ll cover how to do that in the next step).
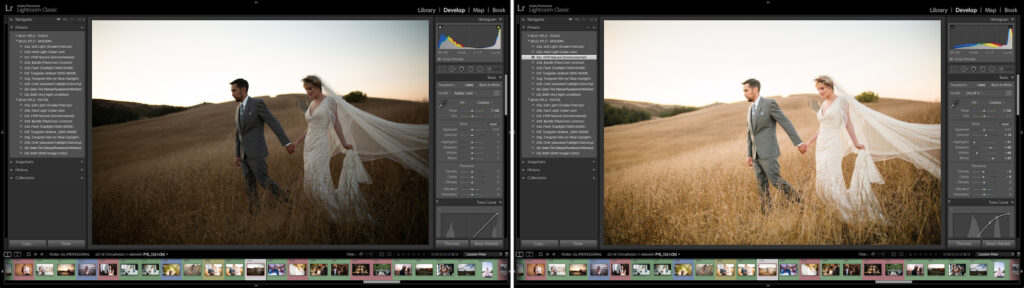
Before and After images edited with Visual Flow Modern Pack > HDR Environmental
Lin & Jirsa Photography uses Visual Flow presets, which are based on lighting conditions (hard light, soft light, tungsten, etc.) to create a consistent look for each scene with minimal clicks. In addition to using a preset, other edits generally include adjusting exposure, white balance, crop, and maybe adding a graduated or radial filter where necessary. We start with editing one photo from each scene to establish a tone setter and then we move on to the next scene.
Pro Tip: LJP’s post-producers use Lightroom’s “Smart Previews” option for color correcting because it effectively balances editing speed and capabilities when working in the Develop Module. You can also transfer the .LRCAT file and its smart previews to a personal laptop or external hard drive and edit the photos on the go.
4. Batch Process Photos Based on Tone Setters
In order to take full advantage of Lightroom’s speed and shave time off of your workflow, it’s important to understand the basics of batch processing. There are a few ways to batch process your photos in Lightroom, including the following:
- Copy & paste settings from one photo to another: In the lower lefthand side of Lightroom’s Develop Module, find the “Copy” and “Paste” buttons. Select the photo you want to copy settings from and then click on “Copy.” Then, choose your settings in the Copy Settings window. Finally, select the photo you’d like to paste these settings to and hit the “Paste” button. While this cut-and-paste method is the most basic way to copy and paste settings, there are better ways to batch process your photos.
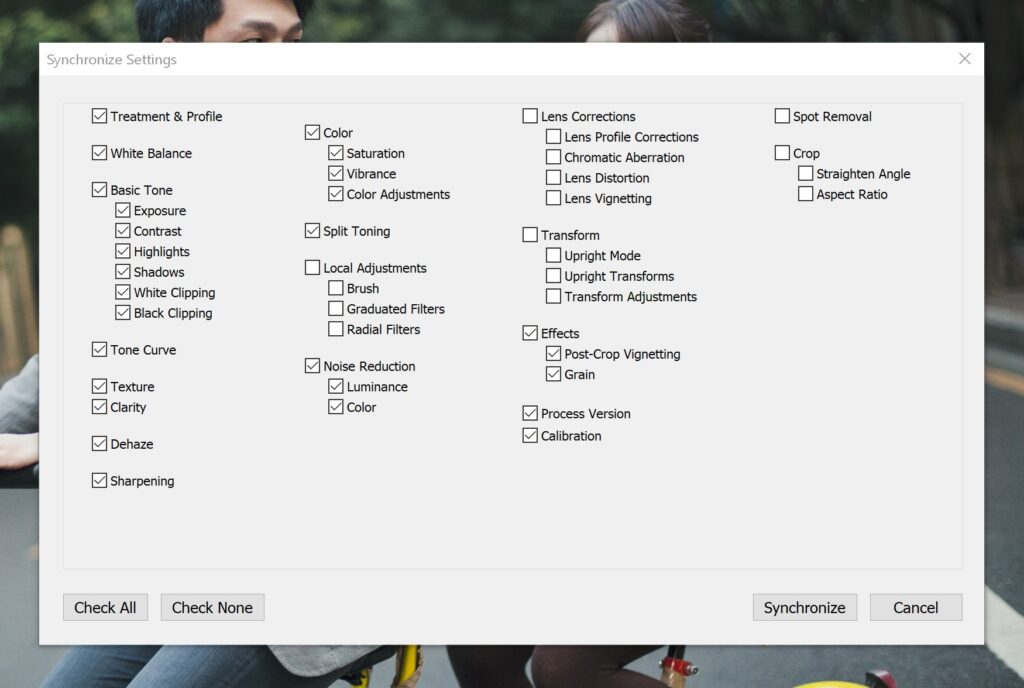
- Synchronize settings between an entire set of photos: Select the photo with the settings that you want to copy and then shift-click or control/command-click the other photos from that scene. Next, hit the “Sync” button in the lower right corner of the Develop Module and select the settings you’d like to copy and paste from the dialog box that opens up, Lastly, click the “Synchronize” button.
- Edit multiple photos at once: To quickly adjust sliders for a group of photos, you can turn on the Auto Sync feature. Hit the “on/off” button at the left edge of the “Sync” button in the develop module, and it will switch to “Auto Sync.” With auto-sync engaged, all of your slider adjustments will synchronize across all selected images.
Pro Tip: Limit your refined edits for sharing on Social Media & Blog or albums and choose your battles when it comes to retouching wide angles vs. close-ups. Close-up portraits typically require more retouching because of the level of detail present, so it might be worth spending more time retouching close-up shots than wider portraits.
5. Use Export Presets
Not to be confused with the presets you used to edit the photos, export presets allow you to streamline the export process and keep your photo quality up to par by dialing in export settings in advance. In Lightroom, the Export Dialog includes options for sizing, naming, and storing your files. Here are some quick tips for exporting to social media and/or print. Note, follow these steps after you’ve edited your photos in Lightroom:
- Export for Instagram & Facebook: Open the Export Dialog (“CMD+Shift+E” for Mac, “CTRL+Shift+E” for PC) and make your selections. The most important settings here relate to file setting, sizing, and output sharpening.
•File Settings: Choose “JPEG” for file type with “sRGB” for the color space. Keep the image quality to between 76%-100%.
•Instagram Sizing: Instagram limits images to 1080 pixels wide.
•Facebook Sizing: See recommendations below.
•Regular photos: 720px, 960px or 2048px wide
•Cover photos: 851px by 315px
•To avoid compression when uploading your cover photo, keep the file size under 100KB
•Output Sharpening: Select “Screen” and “Standard Amount.” - Export for Print: Open the Export Dialog (“CMD+Shift+E” for Mac, “CTRL+Shift+E” for PC) and make your selections.
•Export Locations: Create a new folder for “PRINT” on your computer; then, choose a “Specific Folder” and locate your central “PRINT” folder.
•File naming: Rename the files if you choose.
•File settings: Most print labs prefer JPG files in the color space of sRGB; however, some specialty labs may ask for TIF files and/or Adobe RGB color space for maximum print quality. Set the quality to anywhere between 85-100.
•Image Sizing: Settings will vary based on the lab you’re working with. In most cases, leave Image Sizing alone.
•Output Sharpening Export Settings: Skip this one as well.
•Metadata Export Settings: Skip or choose “Copyright Only” as nobody but you or the printer will see most of the other information.
•Watermark: We usually avoid this for print.
•Post-Processing Settings: Select “Do Nothing.”
•Save Your Settings as an Export Preset: See the “Pro Tip” below.
•Hit “Export”!
Pro Tip: After making your sections from the Export Dialog Box, you can save your settings as an Export Preset. Click on the “Add” button under the “Preset” box and choose “New Folder” under the dropdown menu. Name the folder and the preset (e.g. “Instagram_Export” or “Print Export”) and click on “Export.”
Conclusion
We hope you found these five wedding photography editing tips helpful. Here’s a quick recap of what we covered above:
- Choose a Culling Workflow
- Cull for Story
- Create Tone Setters for Each Scene
- Batch Process Photos Based on Tone Setters
- Use Export Presets
By combining these tips, you should be able to save a significant amount of time in post-production and deliver your best work every time. Happy editing!