This is a guest post from Photo Mechanic power-user and friend of Camera Bits, Caroline Guntur, a.k.a. The Swedish Organizer. See more about Caroline at the end of the post.
🚀 Why Photo Mechanic Is a Must-Have Tool for Pros
As a Certified Photo Manager who regularly deals with massive collections of images, I need tools that work fast, so for me, Photo Mechanic is a no-brainer. The software’s design supports speed-first workflows, and when you layer in smart metadata practices, it becomes an organizing powerhouse. Its flexibility and customization options lets you move through culling and prepping files at a pace that would be impossible in any other software.
In this post, I’ll walk you through three of its standout features — the IPTC Metadata Templates, the Controlled Vocabulary, and Code Replacements — that I use to streamline my workflow and save time. Together, they help me stay organized, save hours of repetitive data entry work, and ensure that every image is metadata-rich and search-friendly.
📸 Favorite Feature #1: IPTC Metadata Templates
One of the best ways to protect your work and make your photos searchable is to apply metadata, but the task can easily become overwhelming. Just imagine typing information like your name, locations, copyright information, and so on, into thousands of photos, little by little. It’s not only tedious; it’s a recipe for inconsistency.
Ideally, you want to embed the following metadata details into every photo:
- The photographer’s name and contact info
- The copyright holder’s name and contact info (if different)
- A default copyright statement
- Date and time of the event
- Title or headline
- Location, including city / state / country
- Caption or description (using code replacements when possible; see #3)
- Keywords that aid in searchability
Can you skip the metadata process altogether? Sure, but it is a big part of staying digitally organized, so it’s not a good idea to do so. Furthermore, IPTC metadata is often required by clients, media outlets, and digital asset managers for publishing purposes. Your work is much more protected with metadata rather than without it, so why would you avoid it? The only argument would be the time it takes to embed it, but that problem disintegrates completely when you have smart tools at your disposal. Photo Mechanic to the rescue.
🔧 How to Use IPTC Metadata Templates
To effectively enter all pertinent information, Photo Mechanic offers up the Metadata (IPTC) Template — a user-friendly panel that lets you fill out these fields manually or create reusable templates. The latter option is the game-changer.
Using pre-built IPTC templates, you can:
- Apply complete metadata in one or two simple clicks
- Eliminate errors and misspellings altogether
- Ensure that every image contains consistent information across the board
I very rarely use anything besides templates nowadays because why reinvent the wheel? It’s always a good idea to standardize your processes to ensure a more streamlined workflow.
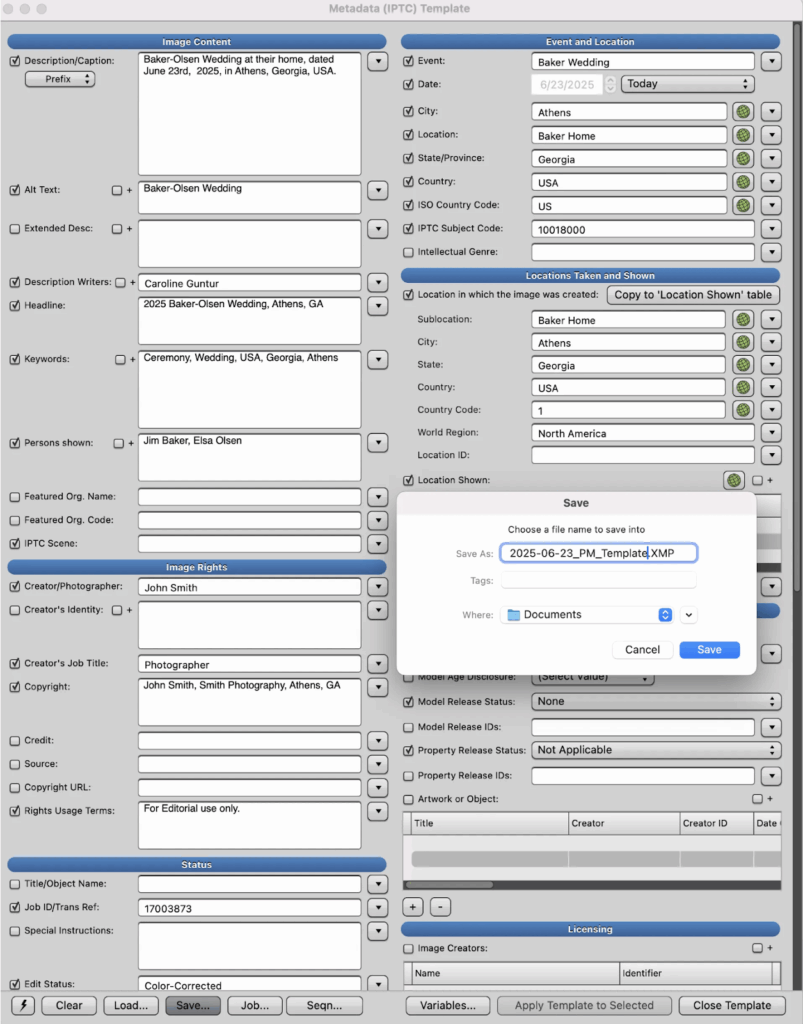
What’s better, pre-building these IPTC templates only takes a few moments. You simply open the panel, fill out the information you’d like for it to contain, and then save it as a template in a specified location (I suggest creating a “templates” folder). Once done, you can load the template at any time, and apply it to any image — either individually or in bulk.
Photo Mechanic makes it easy to create and save various templates for specific purposes, and when necessary, you can apply multiple templates to the same image without overriding previously entered information. It’s not unheard of for me to apply multiple IPTC templates to my photos (one after another) for maximum efficiency.
🕒 Why It Saves Time
When you’re organizing thousands of photos, having this type of shortcut shaves hours off every single project. When I start any new project — whether I’m organizing a family archive, or processing images from a photo shoot or client event, templates run the show. It’s the best way to get all your content organized and searchable in the least amount of time possible. Learn how IPTC metadata templates work in Photo Mechanic, and you will save yourself hours of redundant typing.
🗂 Favorite Feature #2: Controlled Vocabulary
Continuing on the topic of organized digital information, let’s also cover another one of my favorite features: the Controlled Vocabulary panel.
Tagging images with consistent, searchable keywords is crucial — especially when you’re dealing with massive archives… but manually remembering the exact phrasing or taxonomy? That’s a productivity killer. This is where Photo Mechanic shines yet again.
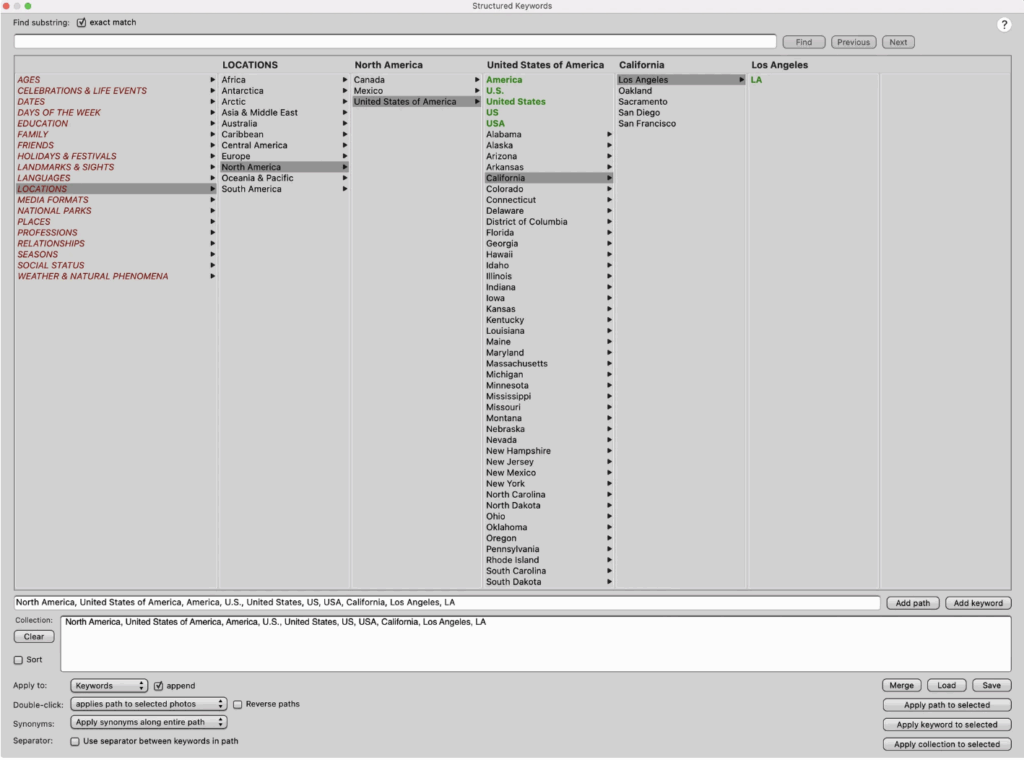
The Controlled Vocabulary pad allows you to build a customized, structured list of keywords that you can easily browse and insert into any collection of photos.
🔧 How I Use My Controlled Vocabulary
Unlike a flat list that you have to scroll through for hours, a hierarchy allows you to visualize the nesting structure, which makes it so much easier to find the right words and phrases.
I’ve customized my own keywords list based on the kind of work I do, so for every job, I can pre-populate and update it as needed with just a few clicks. Not starting from scratch every time is key.
My keywords list is about 12,000 tags big and includes several nested categories, such as:
> Celebrations & Life Events
> Wedding
> Ceremony
> Locations
> North America
> USA
> California
> Los Angeles
{LA}
Being an avid traveler, I seem to use the location tags the most. For my clients, I would say it’s the event tags. Even though it took a little bit of time up front to create it, that list has paid for itself in ROI many times over.
🕒 Why It Saves Time
One of the biggest mistakes that people make with large photo archives is to use freeform tagging. In other words, they will make up and type in keywords as they go, not remembering what words they have used in the past. As a result, the archive becomes inconsistent, and clients don’t get accurate results when searching for images. It’s unprofessional at best.
Similar issues often happen with AI tagging when you let automation decide what words to use. It tends to render a bunch of terms that no one will ever search for, which then clutters up the rest of the list and prevents users from finding what they need.
Using a custom-tailored controlled keyword vocabulary eliminates the possibility of forgetting words or making typos because the nested structure doesn’t allow for it. Instead of manually trying to remember to type in “Wedding,” “Bride,” and “Ceremony” as three separate words, you can quickly click through the decision tree and tag all of them in multiple images in under five seconds. Multiplied across thousands of images? That’s efficiency defined.
🍭 Favorite Feature #3: Code Replacements
Let’s face it, stories are what make photos come alive. The people, the places, the context — it’s what actually matters. The manual labor that comes with it, though? Not so much. It’s time-consuming and clunky to copy and paste names, job titles, and other information in from spreadsheeted guestlists.
Naming people quickly and accurately is a major challenge in event photography as well as in any portrait-heavy work. This is where you can benefit from creating variables using Photo Mechanic’s Code Replacements feature. If I had to name the software’s most underused superpower, it would probably be this one. This feature looks small at first, but it’s a massive time-saver once you understand how it works.
🔧 How I Use Code Replacements
When captioning large collections of photos, especially from popular public events, you might repeat the same person’s name or job title 30+ times. The same holds true for job titles and other similar contexts. Code replacements will help you type much faster and avoid errors, especially when there are a lot of difficult-to-spell names involved.
Let’s say that you have a few thousand images to caption from a family archive. How would you go about it? Well, instead of typing out full names, events, dates, etc., over and over in the Caption/Description metadata field, you would create codes in Photo Mechanic with a simple .txt file. This gives you the ability to type out shorthand codes that expand into longer strings of text — automatically — to help you enter data more quickly.
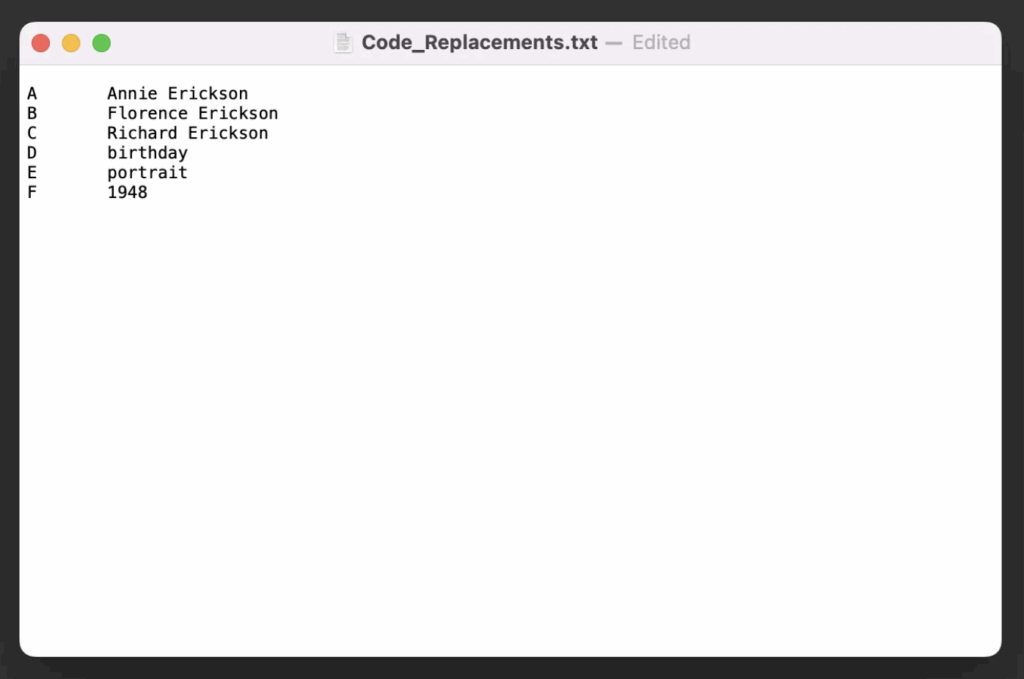
You create the text template in advance and organize it with tabs, like this:
A Annie Erickson
B Florence Erickson
C Richard Erickson
D birthday
E portrait
F 1948
Then, instead of spelling everything out when typing the caption, you replace the full names and words with the short codes.
If I were to type the following into the caption field in Photo Mechanic (using the example list above), I could write the following:
“Here is \B\ and \C\ with their daughter \A\ on her \D\. This is a \E\ from \F\.”
Photo Mechanic would then automatically use those short codes and expand that caption to read:
“Here is Florence Erickson and Richard Erickson with their daughter Annie Erickson on her birthday. This is a portrait from 1948.”
Fun, isn’t it? What makes it so great is that you can create whatever short codes you need for your project, so it’s completely tailored to your preferences.
🕒 Why It Saves Time
As we’ve already covered, spelling mistakes and inconsistencies are what doom a digital archive, so if you can prepare a simple reference list with some code replacements ahead of time, you can save yourself countless hours of mental strain. No more trying to copy and paste complex information in from other databases. Sport and event photographers rejoice!
In one digital archive I worked on for a non-profit association, I captioned 6847 photos (featuring 150+ people) in a matter of hours simply because I had an accurately referenced code replacements list. Score three for productivity. This is system that scales impeccably from 100 to 10,000+ images.
✅ Big Wins from Small Efficiencies
On their own, each of these three features is powerful… but combined, they will save you hours and hours of work, plus ensure accuracy and consistency across all your digital archives. No question. Where there is reliability and predicability in a workflow, productivity follows.
Photo Mechanic’s organizational systems have genuinely transformed the way I work. They allow me to spend less time on repetitive data entry tasks and more time focusing on the creative parts of my job, including teaching others how to achieve the same great results.
Across the board, you get excellent results:
| Benefit | Result |
| Speed | Save 15–30 minutes per collection on data entry and organization |
| Precision | Zero spelling mistakes in names, titles, captions, and keywords |
| Consistency | Predictable, searchable archives for use long-term permanence |
| Scalability | Works regardless if you have 500, 5000, or 50,000 images to organize |
If you’re just starting out with Photo Mechanic or haven’t explored these three excellent productivity tools yet, I can’t recommend them enough. Set them up once, and they’ll pay you back tenfold.
Want to See This in Action?
I have an entire module dedicated to time-saving features like these in my online course DPO PRO: The Ultimate Photo Organizing Masterclass; Plus, I include my proven (and completely customizable) controlled keywords list as a bonus for advanced students. Photo Mechanic users also get a special offer on the Photo Mechanic software with enrollment.
Learn more at https://www.theswedishorganizer.com/dpopro
🔚 Final Thoughts
Photo Mechanic isn’t just a fast image browser — it’s a complete workflow engine. When you layer IPTC Templates, Code Replacements, and Controlled Vocabularies, your digital organizational process becomes lightning fast, bulletproof, and repeatable.
As a Certified Photo Organizer and Photo Mechanic trainer, I’ve seen these types of workflow transform how both professionals and personal organizers manage photo vaults. Set it up once, and you’re building efficiency that pays dividends project after project. Cheers to your productivity!
________________
About the Author:
Caroline Guntur, a.k.a. The Swedish Organizer, is an Organizing & Productivity Coach who helps creatives and entrepreneurs get their digital ducks in a row and become more productive, so there’s more time for exploration and play. Through her online courses and coaching offers, she empowers her clients to make better decisions as well as maximize the ROI on their time, project management, and organizing efforts using proven techniques.
She is a 10-year Golden Circle Member of NAPO (The National Association of Productivity & Organizing Professionals), a Certified Photo Organizer, and specialist in digital asset management. Her work has been featured in several books as well as in publications like Better Homes & Gardens, Brides, Authority, Reader’s Digest, ThriveGlobal, and Parade.Her best-selling online course DPO PRO: The Ultimate Photo Organizing Masterclass teaches best practices in photo organizing, beginner to advanced workflows, as well as how to use the most popular software options on the market today, including Photo Mechanic.