
Setting Up Photo Mechanic: Quickstart guide to Preferences
Note: This guide can be downloaded as a PDF (Photo_Mechanic_prefs.pdf) if you want to print it and keep it handy when setting up Photo Mechanic for the first time
Getting the most out of Photo Mechanic can involve configuring your preferences around some basic questions about your workflow. Let’s take a look at some of your options in Preferences. We suggest getting used to the keyboard shortcut for opening Preferences:
macOS: command-, (comma)
Windows: control-, (comma)
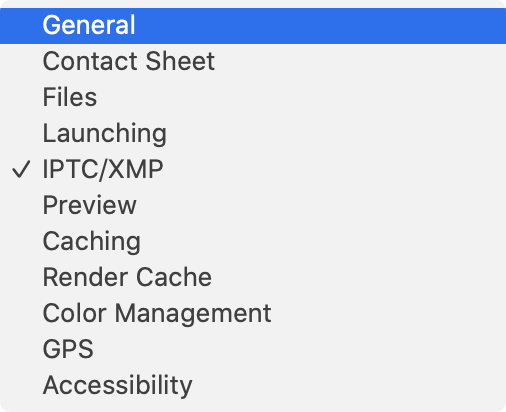
The Preferences window is organized into subsections that are accessed on macOS by a dropdown menu. On Windows, they are organized by tabs.
|
Preferences menu on macOS: |
Preferences tabs on Windows:
|

In this guide, when we reference a certain section of Preferences we will note that like this:
Preferences > Launching
We will not try to describe every available preference here, but we will go over some of the first ones you will want to be familiar with as you start using Photo Mechanic for the first time. Consult the documentation at https://docs.camerabits.com for in-depth information on each Preference setting. (Note, these Preferences suggestions apply to both the standard Photo Mechanic as well as Photo Mechanic Plus.)
For now, we’ll cover these topics:
- How you’ll be ingesting files off your memory card
- How to configure your own personal rating/culling workflow
- How to set up post-processing options for other software
Ingesting files off a memory card
Our recommendation for best practice is to copy the entire contents from your memory card to your main local hard drive or SSD. This is the safest option, and we’ll explain why below. After you do that, you will be able to scroll through images quickly and use Photo Mechanic to decide which images are keepers and which are rejects.
There is a preference for what Photo Mechanic will do when you plug in a memory card
in Preferences > General:
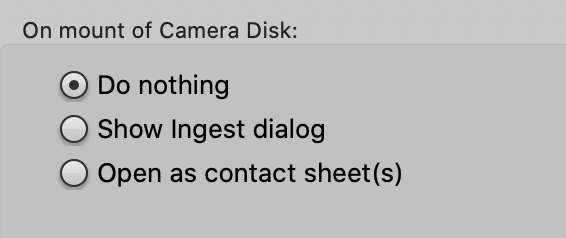
Choosing to Show Ingest dialog will enable you to get the Ingest process going as soon as possible, and is often the best option for most people. For more information on options in the Ingest dialog, see the Documentation page for Ingesting photos with Photo Mechanic.
There is also the option to Open as contact sheet(s) but if you do that, you should take care NOT to rate or add metadata to the files while they live on the memory card.
There is a small but real risk that changing or writing metadata directly on a memory card could corrupt the data on that card, and you would not be able to access any of the photos.
If you use the Open as contact sheet(s) option, only use it to view images or copy some of them to your hard drive before you start rating or editing metadata.
Choose your workflow: Color Class or Star Rating?
There are three main ways to “cull” a group of photos in Photo Mechanic to pick keepers, winners, selects, alternates, and/or rejects.
|
|
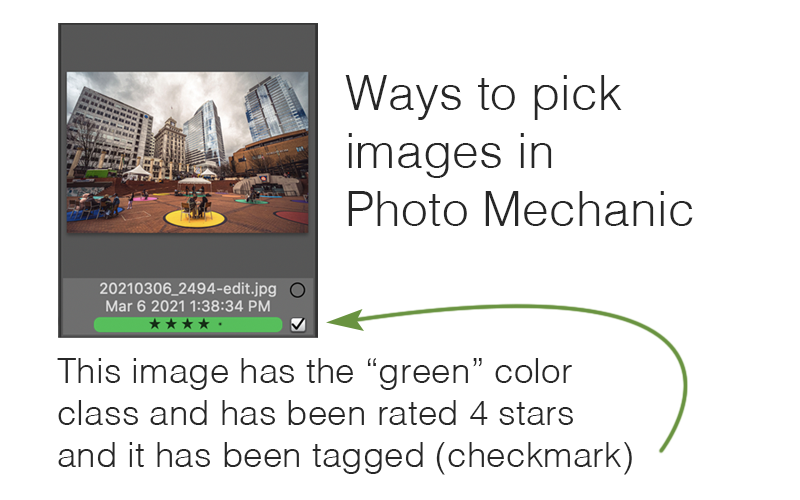
Photo Mechanic is built to let you work as fast as possible, and there is a setting that will let you add a color class or a star rating with just a single number key. (Tagging an image is always available with the single key t shortcut.)
In Preferences > Accessibility, there is is an option how you would like to set up your single key shortcuts to add star ratings or color classes
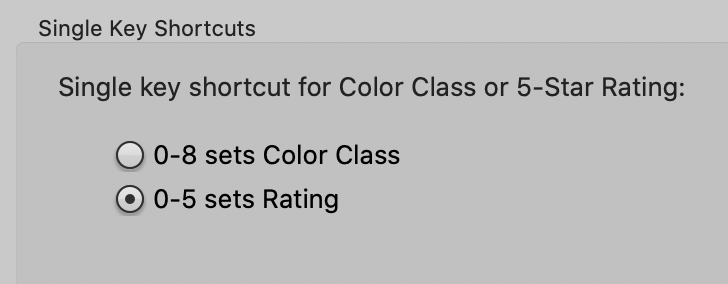
If you choose 0-8 sets Color Class then single key press 0-8 will set that color class to the current image. You can still add a star rating with the CTRL key on macOS and the ALT key on Windows and 0-5. Example: On macOS, CTRL-3 will set a 3-star rating.
If you choose 0-5 sets Rating you can set the star rating for the current image with a single keypress. You can still set Color Class with the COMMAND key on macOS and the CTRL key on Windows. Example: On Windows CTRL-2 will set a yellow color class.
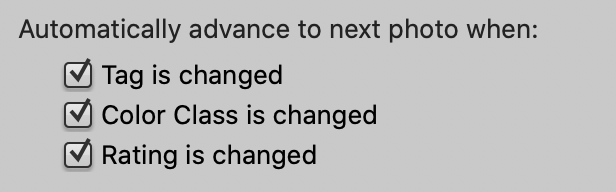
Auto Advance
When culling images, once you set a rating or a tag or a color class, you could normally use the arrow keys to go to the next image. Photo Mechanic can save you a step by automatically advancing to the next image. This enables you to work even more quickly. Find this in Preferences > Preview
Post Processing Options
The last thing we’ll cover is setting up your preferences for what sort of other software you’ll be using. Photo Mechanic makes every effort to “play nice” with other applications so that you can get your work done as fast as possible. We know it is vitally important that the ratings, color classes, and keywords follow your images from Photo Mechanic into other software as well. Here are a few things you can do in Preferences to make sure that happens:
Match your colors
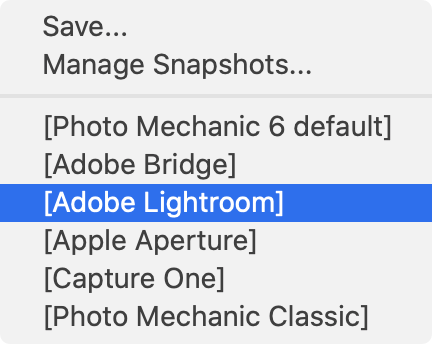
To make sure your Color Classes match up with the ones in Adobe Lightroom, it is vital that the actual names of the colors match. In Preferences > General, there is a preset “snapshot” that will change the colors in Photo Mechanic to match the ones in Lightroom.

Click the snapshot icon to get a list of presets for matching the colors in other software. (Note: Adobe Lightroom only uses 5 colors, so “Purple” will be duplicated a few times.)
Match your metadata
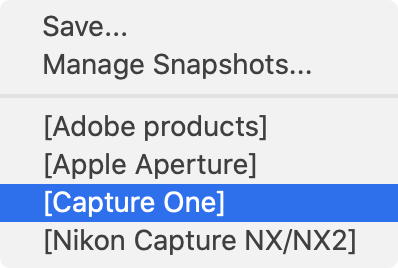
Color classes aren’t the only things that pass along from Photo Mechanic to other software. Different applications use different methods of handling metadata. Photo Mechanic tries to match up with those different ways of doing things. Look under Preferences > IPTC/XMP to see a lot of these options.
Once again, click the snapshot icon to get a list of presets that will configure Photo Mechanic to best work alongside other popular software like applications from Adobe, Capture One, and others.
Configure external editors
Finally, we’ll want to set up Photo Mechanic to open images in other software for processing. There are many different options here as well, but first, we should point out that the fastest way to get images from Photo Mechanic into other software is often just to drag and drop.
That is not your only option, however. When you are looking at an image in Photo Mechanic, pressing the e key will open up that image in your computer’s default editor for that filetype, like Adobe Photoshop. If you want more control, you can look in Preferences > Launching. Here you can control if Photo Mechanic will use the default editor on your system or a specific editor you’d like to use with Photo Mechanic. You can specify different external editors for photos and videos if you prefer.
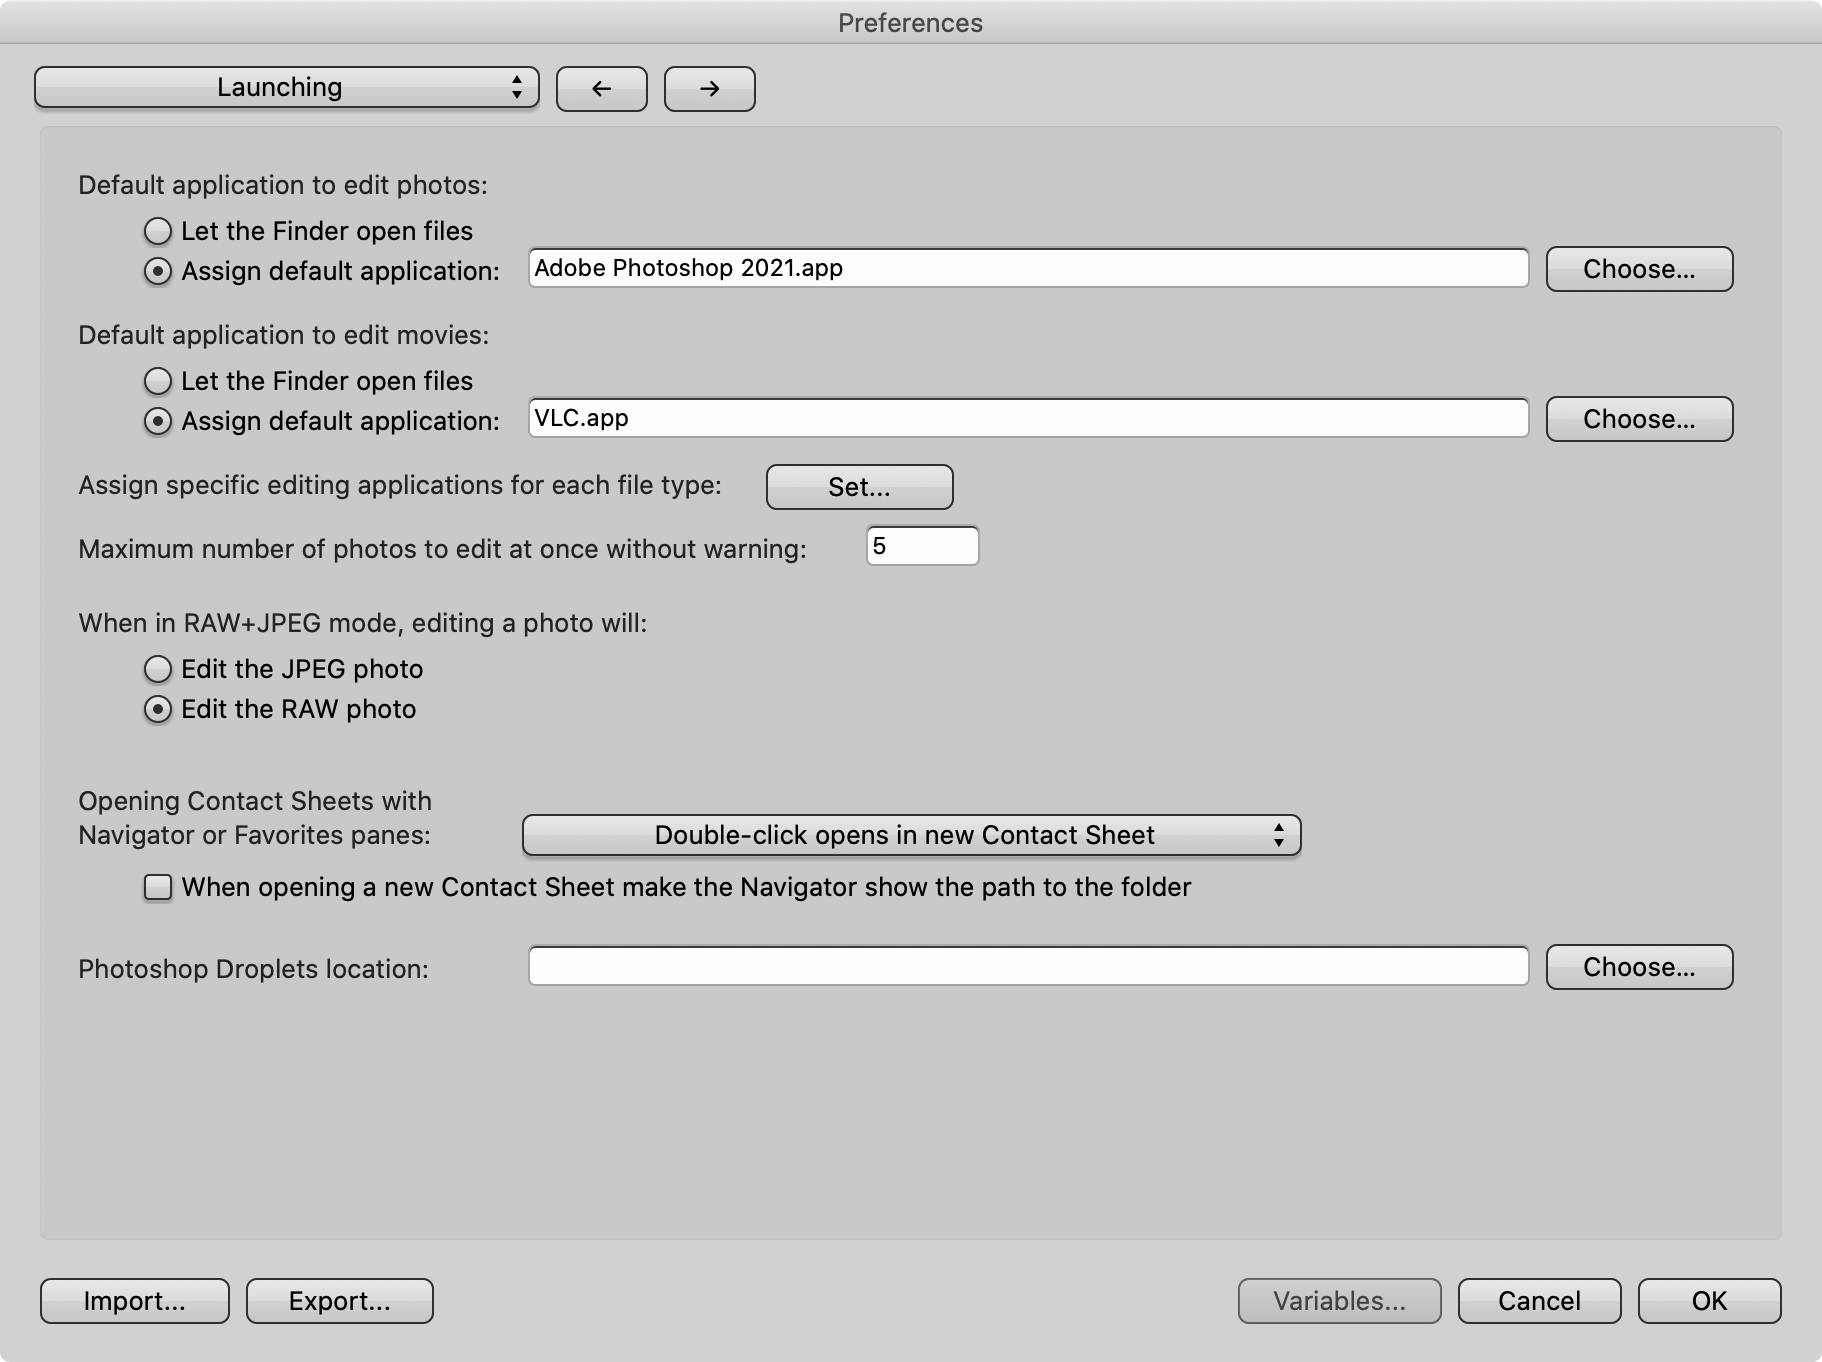
In the example above, Photo Mechanic has been configured to open photos in Adobe Photoshop and movie files in VLC. You can also fine-tune these options for specific file types by clicking the Set… button and choosing different editors for many different types of files.
Summary
Photo Mechanic can be configured in many different ways to match your specific workflow. These are just a few of the common options for getting started. Again, for a closer look at each specific Preference setting, go to https://docs.camerabits.com
Happy photographing!
Note: This guide can be downloaded as a PDF (Photo_Mechanic_prefs.pdf) if you want to print it and keep it handy when setting up Photo Mechanic for the first time