Convert RAW files to JPEG using Photo Mechanic
This #WorkflowWednesday, we wanted to share how to utilize Photo Mechanic to convert RAW to JPEG and still get a size you can use. There are two ways that this can be done:
- The “Extract JPEG Previews from RAW Photos” utility located in the Tools menu. This utility will extract the embedded JPEG preview as it is in the file, without recompressing it, so it’s lossless.
- The “Save As” utility. This utility will allow you to create a new JPEG, allowing you to crop and resize the pixel dimensions, or change the compression level. In the “Save As” dialog, you will find controls for quality, file size limits, and scaling. Below are a few examples that will hopefully give you a better idea of how our “Save As” dialog works.
Examples of the “Save As” Utility
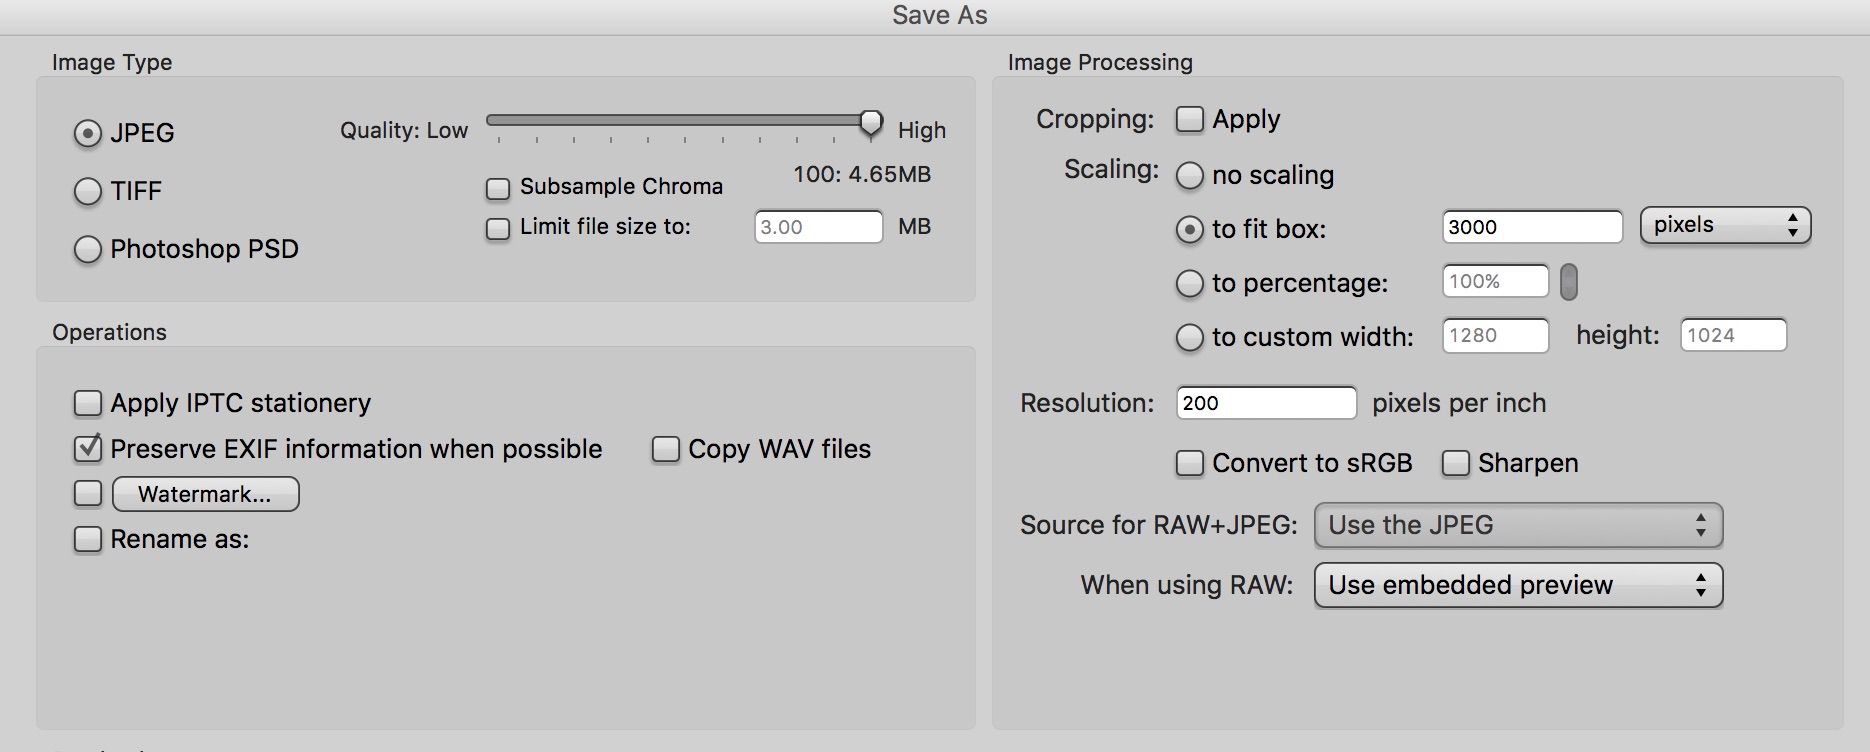
Example 1: Let’s say we wanted to create a JPEG file of maximum file size and scale the largest pixel dimension 3,000 pixels:
- Uncheck the box for “Limit file size to”.
- Move the “Quality” slider position all the way to the right side (high).
- Choose the “to fit box” option under “Scaling” and set the value to 3,000.

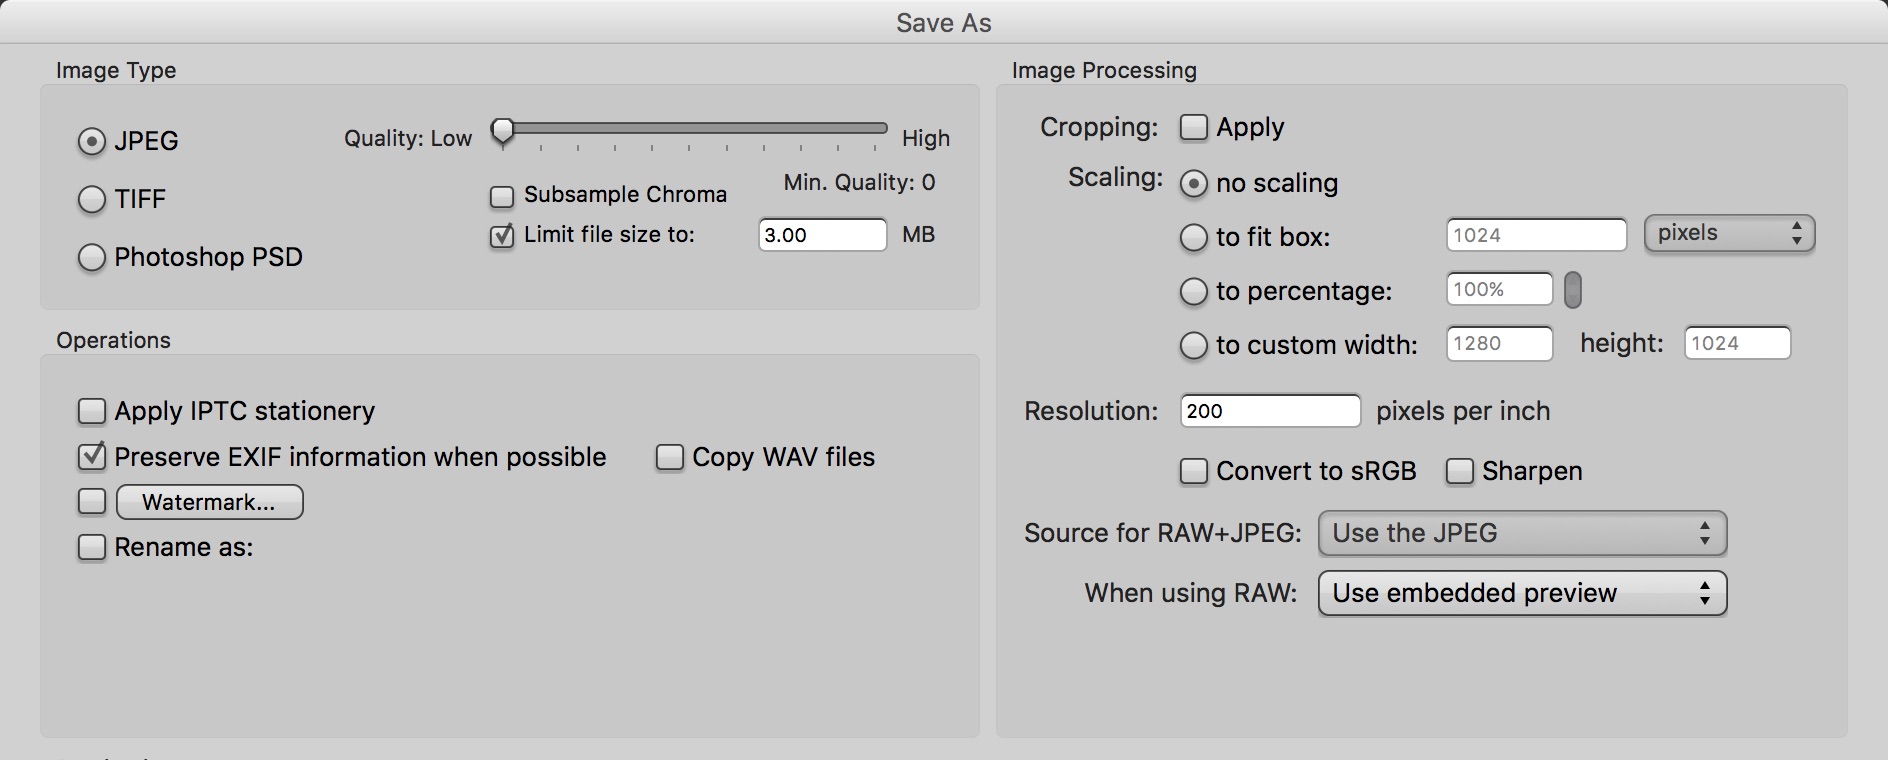
Example 2: Now we’re going to create a JPEG file at a maximum file size of 3 MB, without changing the pixel dimensions:
- Check the box for “Limit file size to” and set the value to 3.
- Now move the “Quality” slide all the way to the left (low). We want the quality as low as possible so that the file size limit can take over control. The “Quality” slider takes precedence over the file size limit if the target quality size is larger than the file size limit setting.
- Set the “Scaling” option to “no scaling”.
Note: the Resolution setting does nothing to the size of the file, only for printing.

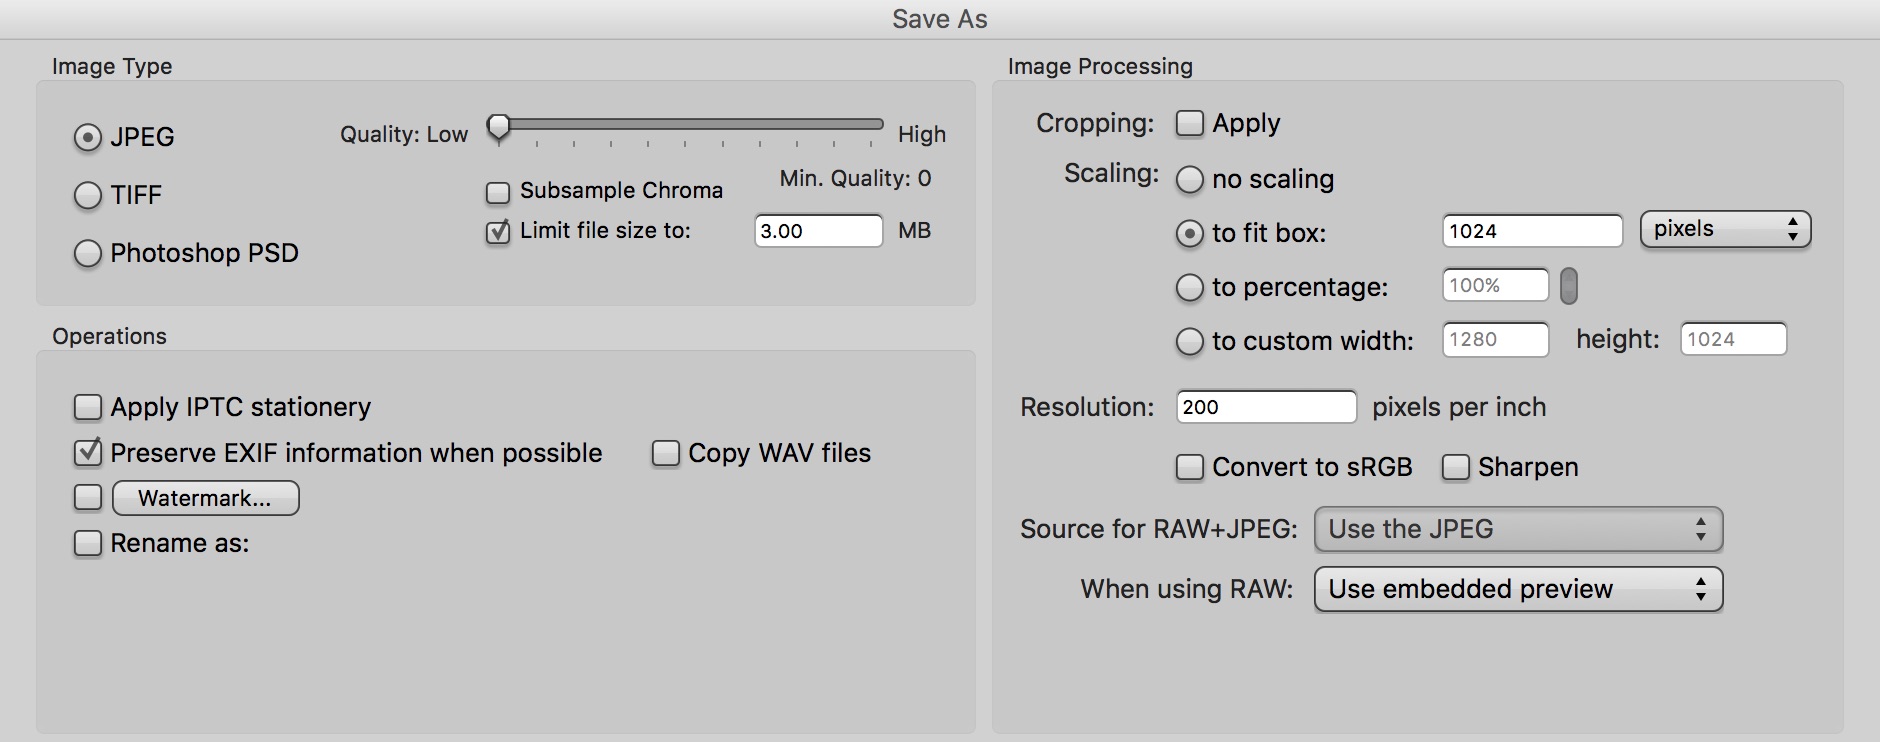
Example 3: Let’s say we wanted to create a JPEG file and limit the pixel dimension to 1,024 pixels with a maximum size of 3 MB:
- Check the box for “Limit file size to” and set the value to 3.
- Now move the “Quality” slider all the way to the left (low).
- Set the Scaling option to “to fit box” and enter 1,024.
Note: In this example. our JPEG file is smaller than 3 MB because there aren’t enough pixels to hit the 3 MB limit.

In each example, you will need to click the “Save” button to complete the process.
Did you learn any new tips from this post? Got any tips of your own to add? Let us know on on Facebook and Twitter and follow us for more tips every #WorkflowWednesday.
Haven’t tried Photo Mechanic yet? Sign up for a free 30-day trial here!